Audit logs
Audit logs, also called audit trails, enhance security, ensure compliance, provide operational insights, and help manage risks.
In API Platform, an audit log records organization-level user-specific operations performed via the API Platform Console. It also captures the timestamp and the outcome of the action.
As of now, API Platform captures the following user-specific operations as audit logs:
- Project creation, update, and deletion.
- API Proxy creation, update, and deletion.
- API Proxy promotion initiation.
- API Proxy version creation.
- Organization user management.
- On-premises key management.
- Project-level configuration management.
In API Platform, organization administrators are allowed to view audit logs by default. If other members need to access organization-specific audit logs, the administrator can create a role with the relevant permission and assign it to members. For step-by-step instructions on how to create and assign a role with relevant permission, see Manage audit log access.
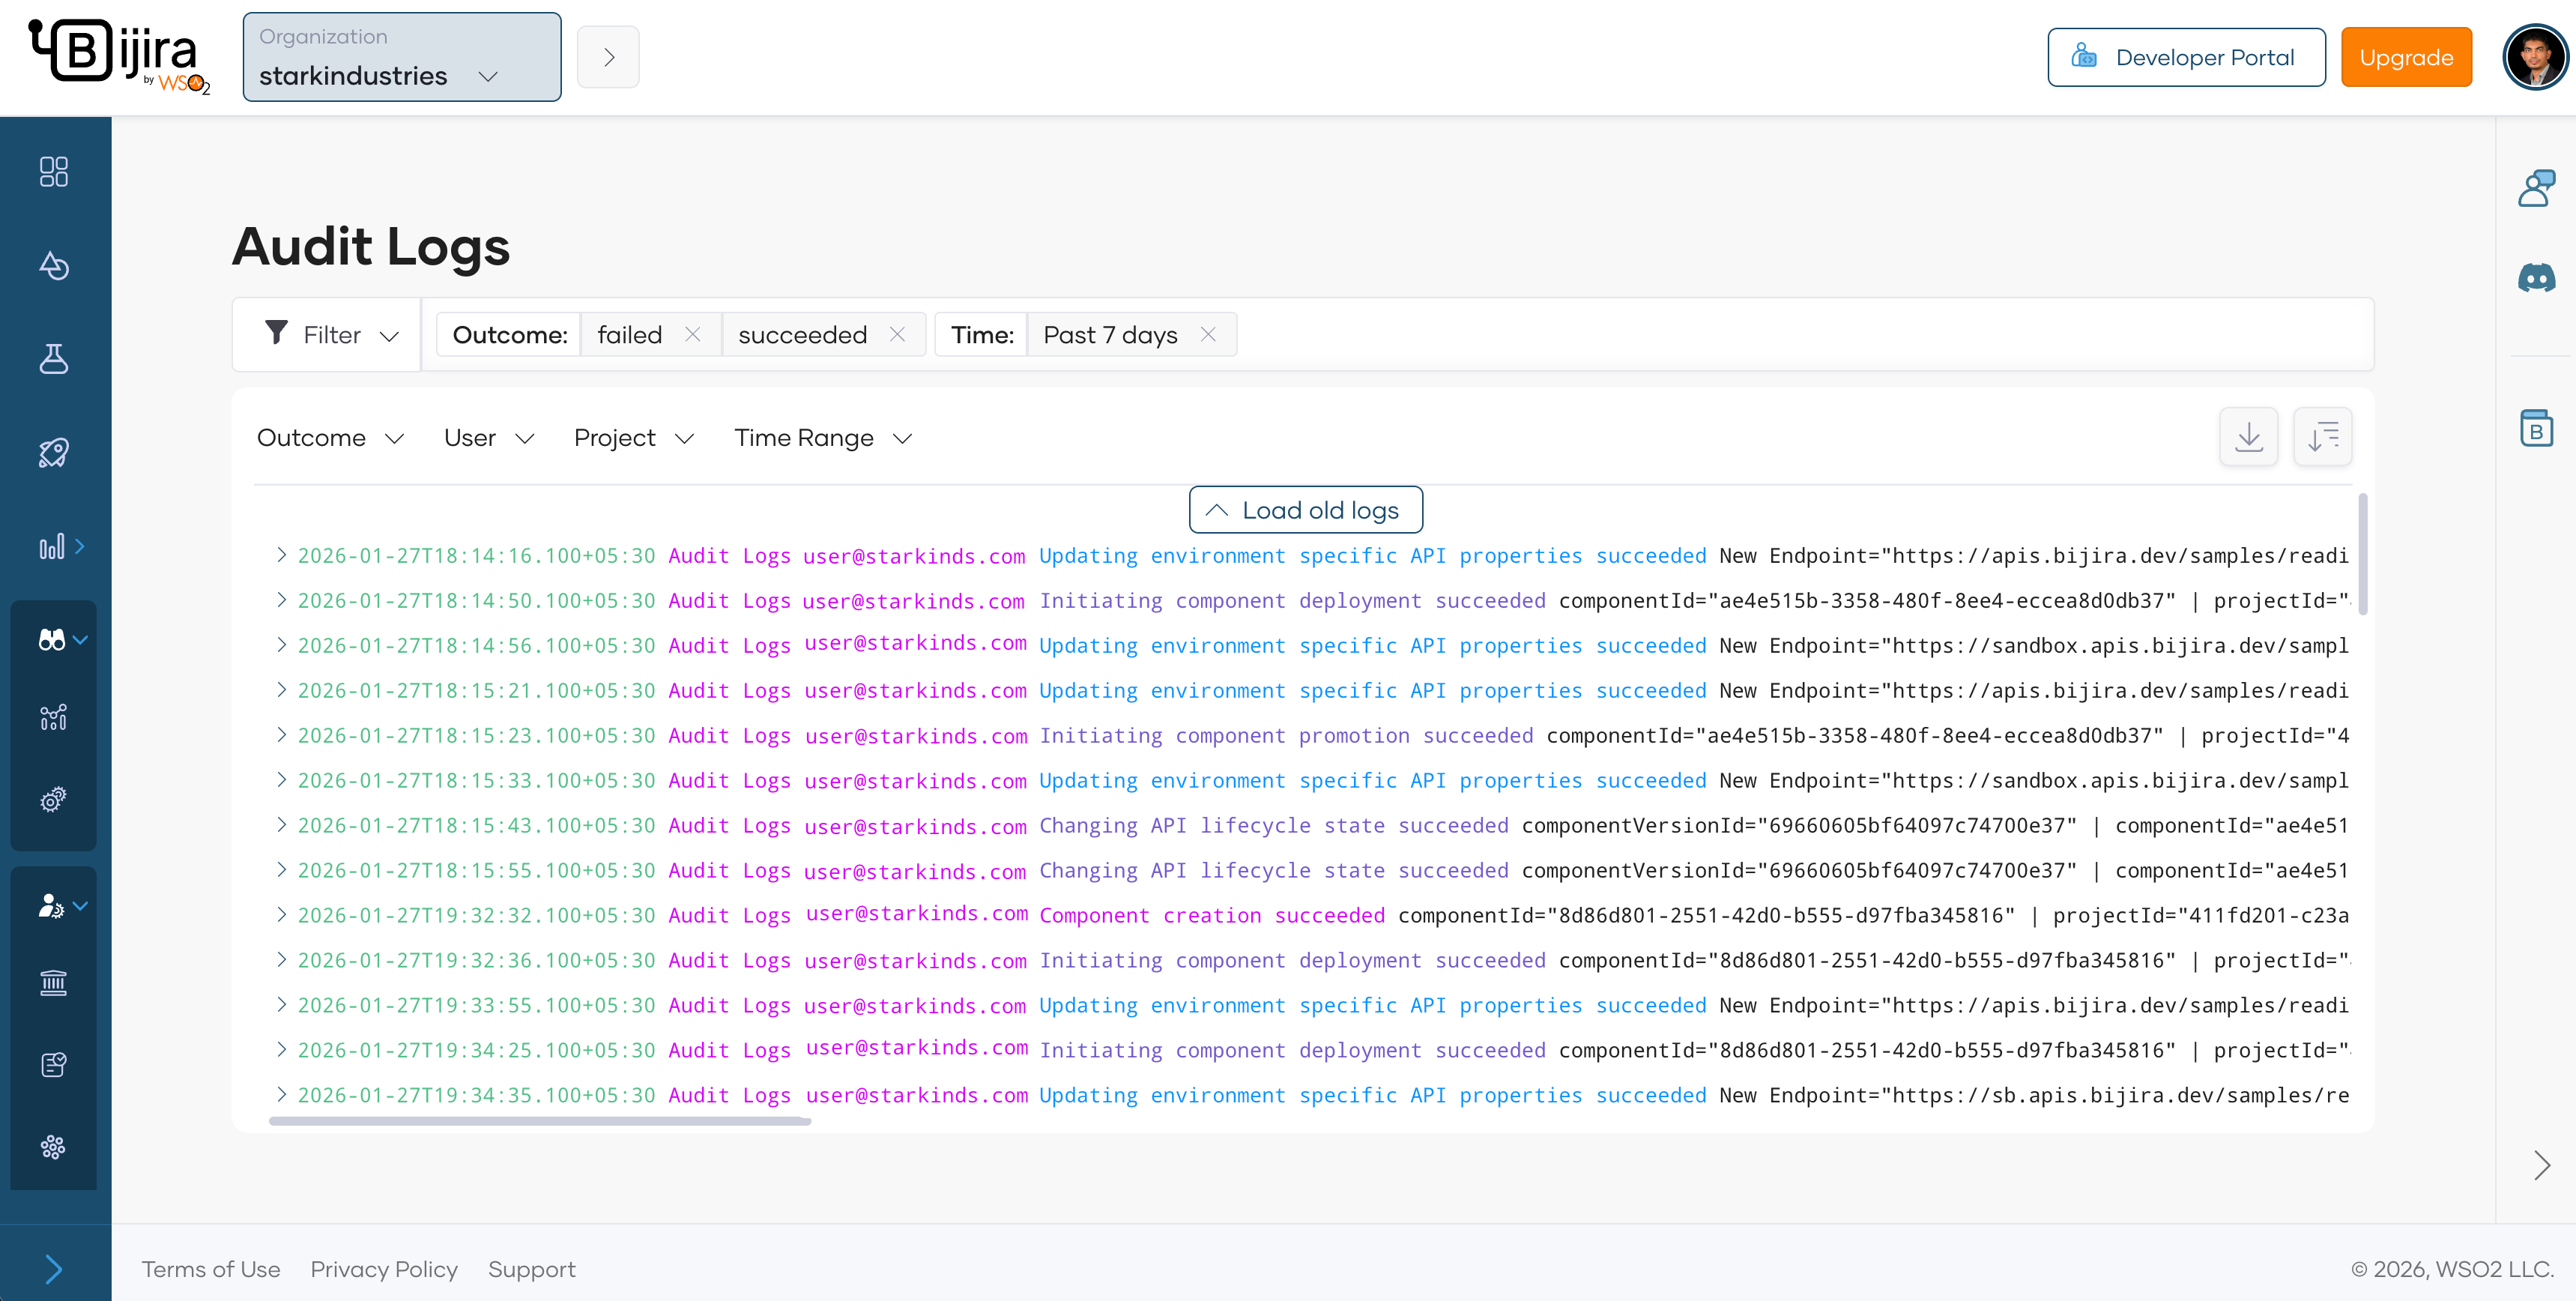
To view audit logs, follow these steps:
- Sign in to API Platform.
-
In the API Platform Console, go to the top navigation menu and click Organization.
Tip
As of now, you can only view organization-level audit logs.
-
In the left navigation menu, click Admin and then click Audit Logs. This displays audit logs for the past 30 days by default.
To view audit logs based on a specific time range and other requirements, you can apply the necessary filter criteria.
Audit log retention
API Platform retains audit logs for one year and archives them for an additional year. Therefore, the total retention period for audit logs is two years.
Manage audit log access
Follow the steps given below to create a role with audit log access permission and assign it to organization members who need access to audit logs:
Note
You must be the organization administrator to perform this action.
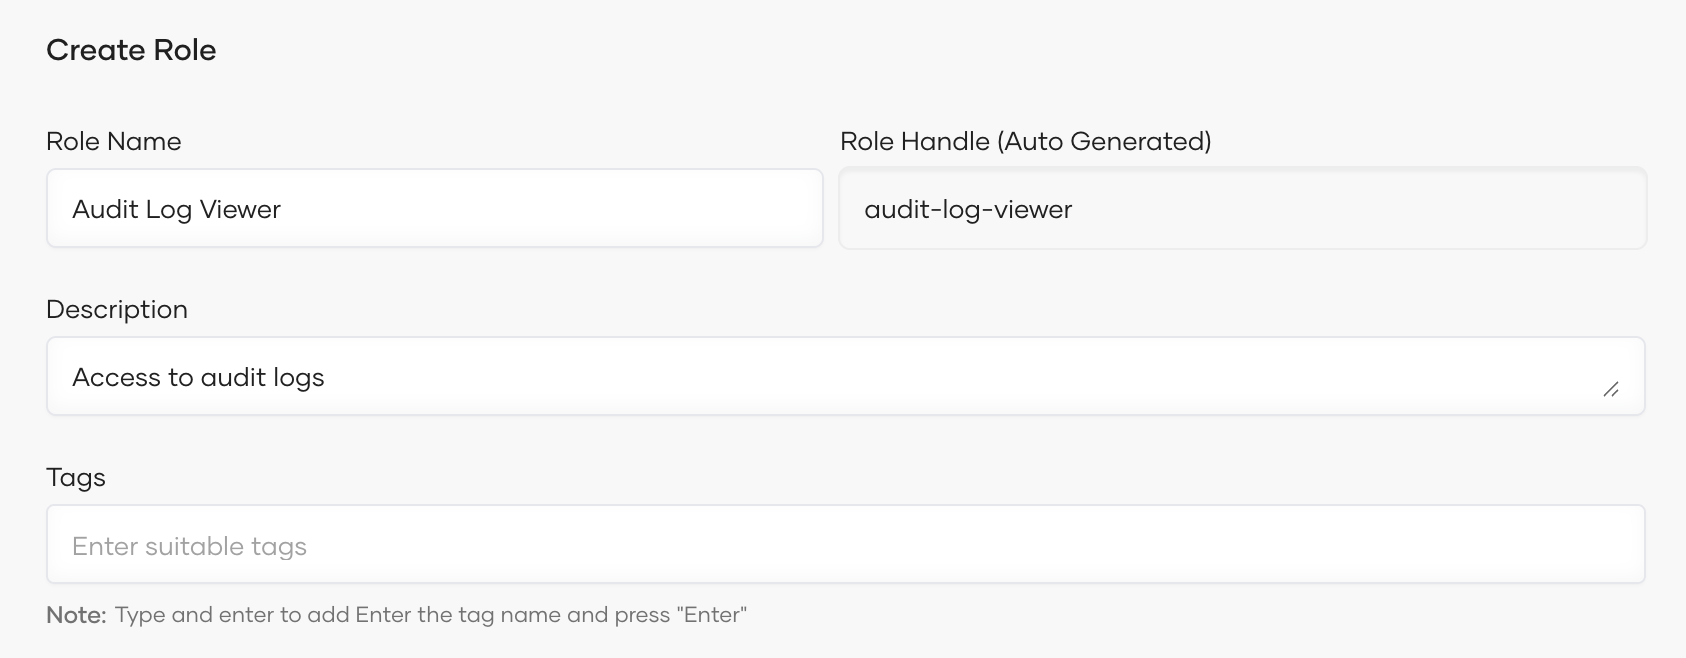
Step 1: Create a role with audit log access permission
- In the API Platform Console, go to the top navigation menu and click Organization.
- In the left navigation menu, click Admin and then click Settings.
- On the Access Control tab, click Roles and then click + Create Role.
-
Enter a name and description for the role.
-
Click Next.
-
In the Create Role dialog, select LOG-MANAGEMENT under Permissions.

-
Click Create.
Step 2: Assign the created role to an organization member
- On the Access Control tab, click Groups. This lists the groups of the organization with their respective details.
- Select the group that you want to assign the role to and click Edit button.
-
Click the Roles tab, and then click + Add Roles to add a new role to the group. Then add the role you created in Step 1 and click Add.
Tip
If you want to invite one or more members and assign them the audit log viewer role, follow the steps given below:
- Click + Invite Member and then click to expand the Roles list.
- Select the role you created in Step 1.
- In the Emails field, enter the email addresses of members you want to invite and grant permission to access audit logs.
- Click Invite. This sends an invitation email to each email address so that the members can accept and obtain access to view audit logs.