Secure API Access with Microsoft Azure Active Directory (Azure AD)
API security refers to the measures and practices used to protect Application Programming Interfaces (APIs) from potential threats and vulnerabilities. Authentication and authorization are key aspects of API security. Authentication is ensuring that only authorized users or applications can access the API. This can involve using API keys, tokens, or more advanced authentication methods like OAuth 2.0. Authorization is controlling what authenticated users or applications are allowed to do within the API. Authorization mechanisms restrict access to specific resources and actions based on user roles or permissions.
Organizations using Microsoft Azure AD for identity and access management (IAM) can seamlessly integrate it with API Platform as an external key manager. This guide will walk you through setting up API Platform to authenticate API invocations through Azure AD which is configured as an external key manager.
This guide walks you through the following steps:
- Assign scopes to an API in API Platform.
- Create an API in Azure AD.
- Create an application in Azure AD and consume the Azure API.
- Enable external key manager authentication and create an application in API Platform.
- Invoke the API with scopes.
Prerequisites
To follow this guide, you need to satisfy the following prerequisites:
- Configure Azure AD as an external key manager.
- An API: If you don't already have a service in API Platform, develop a service or an API Proxy.
- Deploy and publish your API.
- An Azure Active Directory account: If you don’t already have one, set up an Azure Active Directory account at https://azure.microsoft.com/en-gb/.
- Administrator rights to your API Platform organization: You need this to configure the Azure AD account in your organization.
- To create applications, the
Application Developerrole is required. Learn more
Step 1: Assign scopes to an API in API Platform
You can provide fine-grained access control to your API resources with Permissions (scopes) policy. Follow the steps below to assign a Permission (scope) to the resources in the API.
- In the Proxy Listing pane, click on the component you want to attach scopes to.
- In the left navigation menu, click Develop, then click Policy.
-
From the list of resources, click the Attach Policy Button for the required resource.
-
In the Edit Policies pane, click Attach Policy in the respective flow where you want to attach a policy.
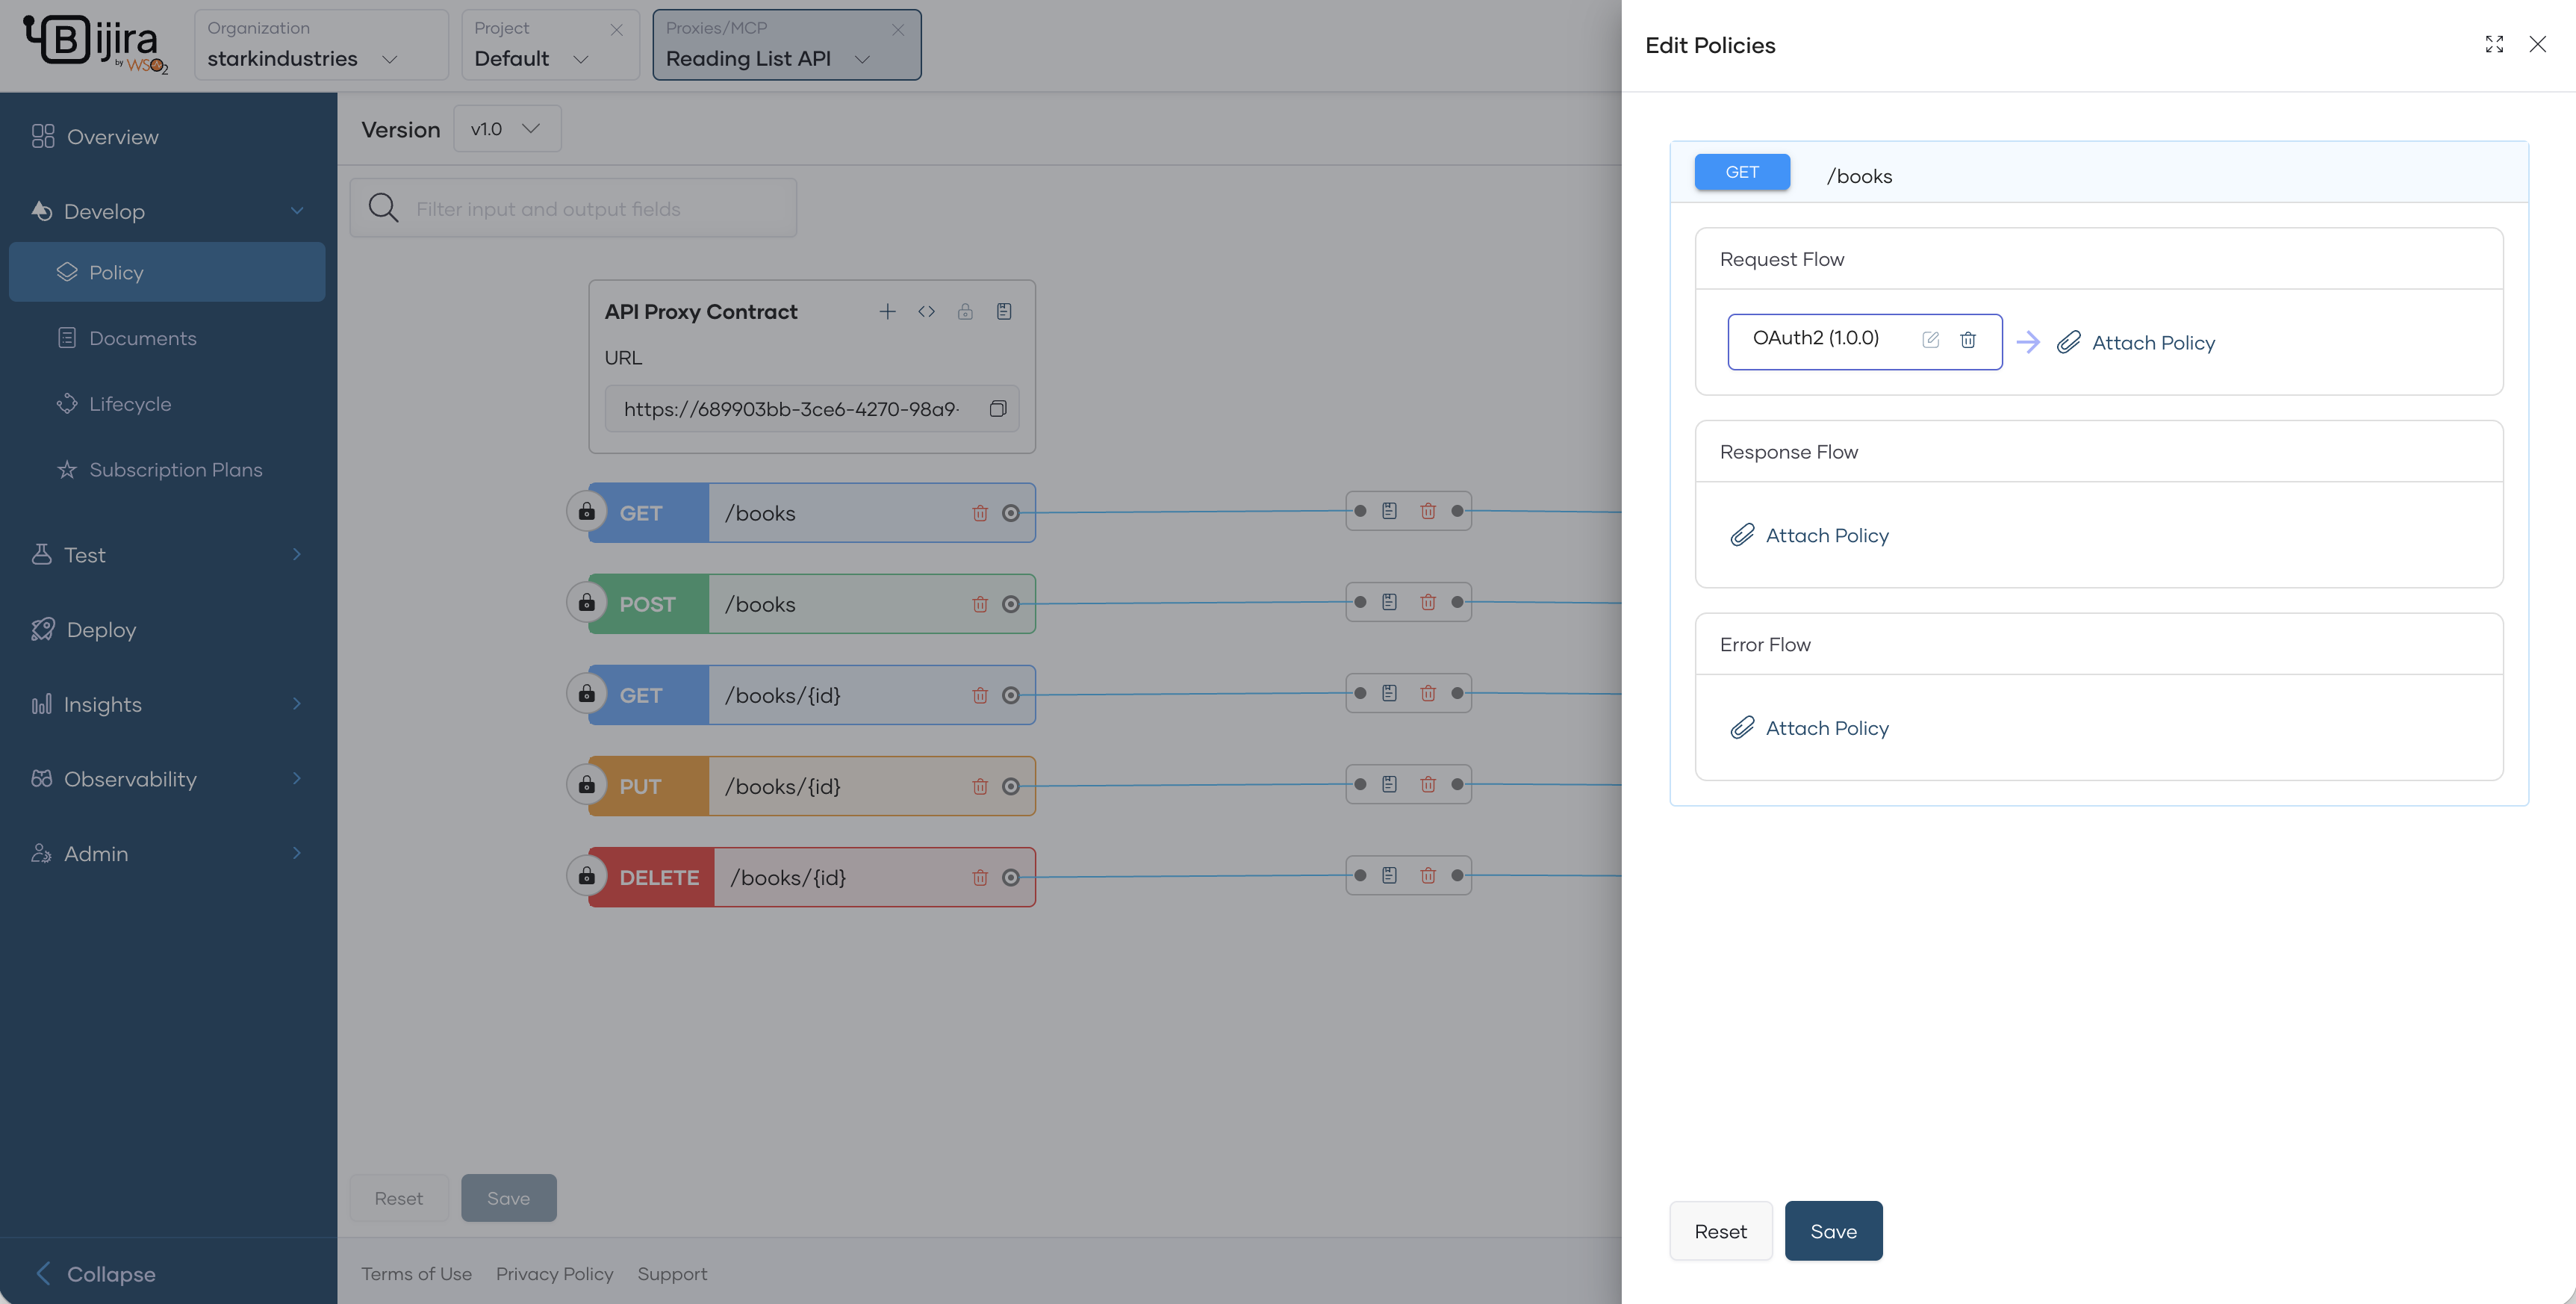
-
In the Policy List pane that opens, click the Permissions (scope) policy. This will show the policy configurations.
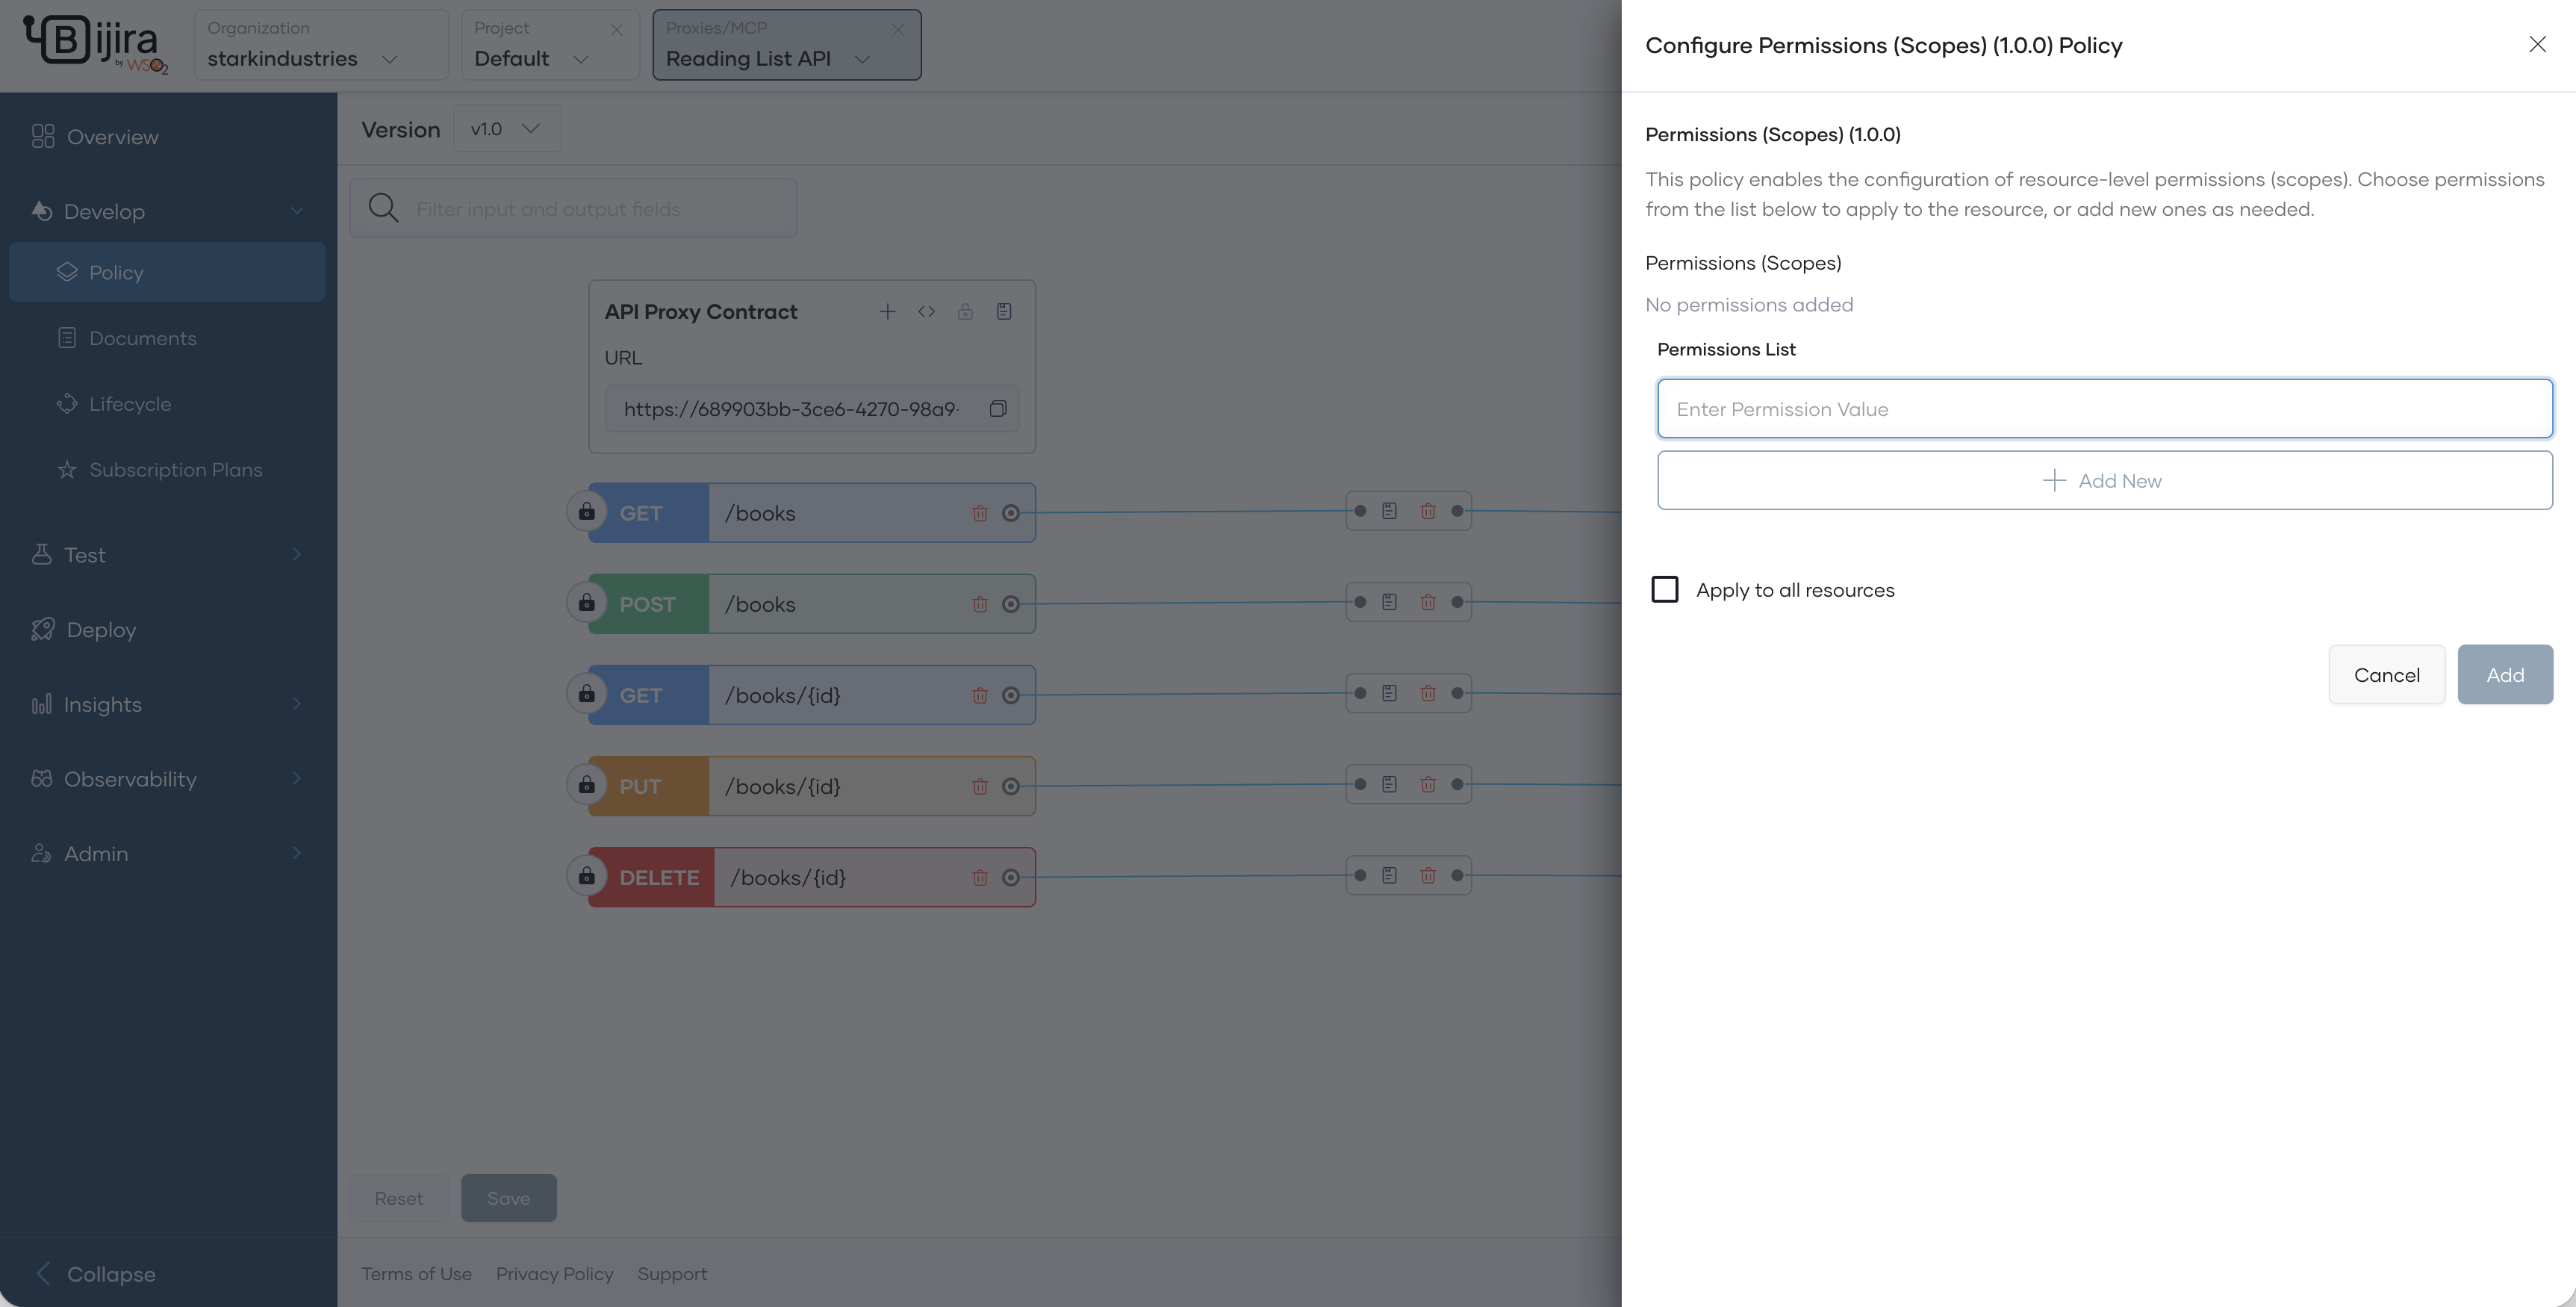
-
In the Permissions List field, add the permission value and click Add New.
- To attach a permission to a resource, select permissions from the Permissions (Scopes) list.
- Once the permissions are configured, click Add and Save the policies and then the API.
- From the left navigation menu, click Deploy and deploy the API and promote to the production environment.
- In the left navigation menu, click Develop and then Lifecycle.
- Click Publish and continue to publish your API to the API Platform Developer Portal.
Step 2: Create a web API on Azure AD
To enable external key manager authentication for APIs, create an API on Azure AD that represents the API on API Platform. Follow the steps below:
- Sign in to the Azure console.
- Follow the Azure guide to create a Web API that represents your API on API Platform.
- In the left navigation menu, under Manage, select Expose an API.
- Add the default Application ID URI and click Save and Continue.
- Under Scopes defined by this API, select Add a scope.
- Enter the fully qualified name as the scope name.
- Define who can consent. You can alternatively add a scope requiring admin consent.
- Enter appropriate values and click Add Scope.
For more information, refer to the Azure documentation:
- Quickstart: Register an application with the Microsoft identity platform
- Quickstart: Configure an application to expose a web API
Step 2.1: Assign users to the web API
You can restrict users to the API as follows:
- Go to your Azure AD main menu.
- Under Manage, click on Enterprise Applications. Alternatively, on Microsoft Entra, under Applications, click Enterprise Applications.
- Select your API.
- Under Manage, select the Users and groups then select + Add user/group.
- Select the users and groups and click Select.
For more information, refer to the Azure documentation: Assign the app to users and groups to restrict access
Step 3: Create a client application on Azure AD and invoke the Azure web API
To expose the API to application developers, create an application in Azure AD. This application provides you with a client-id and client-secret that your application needs to use to invoke the API.
Step 3.1: Create a client application
Follow the steps below to create the application:
- Follow the steps in Register an application on Azure to create an application.
-
Configure the platform settings. Enter your client application's redirect URI in the process.
Note
OAuth2 Authorization Grant flow applies to Web Applications.
Step 3.2: Consume the Azure AD web API from the Azure AD application
Once you create the application, select the API and the scopes you want the application to consume. Follow the steps below:
- Go to Azure Active Directory and then click App registrations.
- Select your client application (not your web API).
- In the left navigation menu, click API permissions.
- Click + Add a permission and select My APIs.
- Select the API and the required scopes and click Add Permissions.
- Once you add the scope, click on the scope and copy the scope name and keep it for future reference. Use this as the scope when you invoke the authorize and token endpoint in.
For more information, refer to the Azure documentation: Add permissions to access your web API
Step 3.3: Create secrets for the Azure web application
To invoke the application, provide client secrets to the consuming application. Follow the steps below to generate the credentials:
- In the left navigation menu, click Certificates & Secrets.
- Click + New client secret.
- Provide a meaningful description and the required expiration.
- Click Add.
- Copy the created
Secret IDandValuefor future reference. - In the left navigation menu, click Overview and open the overview page of the API.
- Copy the
Application (client) IDand save it for future reference.
For more information, refer to the Azure documentation: Add a Client Secret
Step 4: Enable external key manager authentication
- Select Azure Active Directory (Azure AD) as an external key manager
Step 5: Create an application in API Platform Devportal
Follow the steps below to consume the API Platform API through external key manager for authentication:
- Sign in to the API Platform Developer Portal.
- Click Applications tab and then click +Create.
- Enter a name for the application.
- Click Create and Subscribe to the API you assigned scopes.
Step 6: Invoke the API with scopes
You can now invoke the API Platform API using the authorization code grant. API Platform will authenticate the user with Azure AD and provide access to the resource.
- On the API Platform Developer Portal, go to your application.
- In the overview, under OAuth2 Credentials, click View.
- Copy the Authorize Endpoint URL.
-
Invoke the authorization endpoint as follows:
- Review the consent in the login screens that prompt and continue.
- After you log in, you will receive an authorization code in the URL. Copy the authorization code and use it to get an access token from Azure AD by following the next steps.
- On the API Platform Developer Portal, go to your application.
- In the overview, under OAuth2 Credentials, click View.
- Copy the Token Endpoint URL.
- Invoke the token endpoint as follows:
curl -X POST -H 'Content-Type: application/x-www-form-urlencoded' \
{token_endpoint} \
-d 'client_id={client_id}' \
-d 'scope={scopes}' \
-d 'code={authorization_code}' \
-d 'redirect_uri={redirect_url}' \
-d 'client_secret={The client_secret value you copied from the Azure Application}'
-d 'grant_type=authorization_code' \
curl -X POST -H 'Content-Type: application/x-www-form-urlencoded' \ https://login.microsoftonline.com/dd912d48-b0be-401f-b18c-8ca89e9c0b6c/oauth2/v2.0/token \ -d 'client_id=5eb1de74-e449-4973-a620-52c4dc9157a9' \ -d 'scope=api://580b40b7-5513-4714-a4e0-8d4e784f7dc6/urn:taylordean:books:books_add' \ -d 'code=0.AXAASC…zZUzKYm18yM_5-SXz1uvRbbGYF7F32hE9zIQFRQY35haD' \ -d 'redirect_uri=https://localhost:9000' \ -d 'grant_type=authorization_code' \ -d 'state=111' \ -d 'client_secret=l4Q8Q~4WKiRXYSQZly5E6Ess.fKf__U1yJR3IaMd' -
Once you receive the access token, you can invoke the API by specifying the scope.