Configure Enterprise Login
With API Platform, you can configure enterprise login to allow users from an external identity provider (IdP) to sign in to API Platform seamlessly without changing their credentials.
This guide walks you through the steps to configure enterprise login for your organization in API Platform.
Prerequisites
Before you proceed with the configuration, set up the following:
- A valid email domain for your organization.
- Access the API Platform Console via your Google, GitHub, or Microsoft account. If you are a new user, create an organization with a unique organization name. For example, "Stark Industries".
Configure enterprise login for your API Platform organization
To configure enterprise login for your API Platform organization, follow the steps given below:
-
If you already have a support account with us, send us your organization name/handle and the email domains specific to your organization through our support portal.
-
If you do not have a support account with us yet, send an email to
bijira-help@wso2.comrequesting to enable enterprise login for your organization.
Tip
Ensure you include the following information in the request: - Organization name or handle. For example, “Stark Industries” or “starkindustries”. - Email domains specific to your organization. For example, “@stark.com”, “@starkindustries.com”, and “@stark.eu.
Sample email
Subject : [Stark Industries] Configure enterprise login
Hi CS team,
I need to configure enterprise login for my organization. Can you please do the necessary configurations to proceed?
My organization details are as follows:
 - Organization name: Stark Industries
 - Organization handle:  starkindustries
 - Email domains specific to my organization: “@stark.com”, “@starkindustries.com”, and “@stark.eu”
Thank you.
Note
You can choose to configure enterprise login for the API Platform Console, the API Platform Developer Portal, or both.
The API Platform support team will perform the necessary configurations and respond to you with a verification code. You must sign in to your domain host account and configure the DNS record for your email domain with the following values:
| Field | Value |
|---|---|
| Name/Host/Alias | Specify @ or leave it blank |
| Time to Live (TTL) | Keep the default value or use 86400 |
| Value/Answer/Destination | wso2-domain-verification:<verification_code> |
Now, you are ready to bring your own identity to API Platform.
Bring your own identity to API Platform
When you create an organization in API Platform, an organization with the same name is provisioned for you in Asgardeo. To bring your own identity to API Platform, you must configure a federated enterprise IdP on Asgardeo in the organization that is provisioned for you.
Follow the steps given below to configure the federated IdP:
- Sign in to Asgardeo.
- To configure a federated enterprise identity provider for your Asgardeo organization, follow the steps in Asgardeo documentation - Add Standard-Based Login.
-
In the Asgardeo Console left-hand menu, click Applications. You will see applications listed with the names, WSO2_LOGIN_FOR_BIJIRA and WSO2_LOGIN_FOR_BIJIRADEVPORTAL.
-
In this example, we’ll configure an external identity for the API Platform Console.
- Click on the WSO2_LOGIN_FOR_BIJIRA application.
- Click the Sign-in Method tab. You can observe the configured connection.
Now, users in your enterprise IdP can sign in to the API Platform Console using their enterprise IDs.
Note
You can follow the same steps to configure the external identity for the API Platform DevPortal using WSO2_LOGIN_FOR_BIJIRADEVPORTAL Application.
Configure role-based access control for enterprise login
To streamline the enterprise login process and grant appropriate permission, API Platform provides the flexibility to configure role-based access control for users who reside in an external IdP.
To set up role-based access control for enterprise login within API Platform, follow the steps given below:
Prerequisites
Before you proceed with the configuration, make sure you complete the following:
- Configure enterprise login for your organization. For instructions, see Configure enterprise login for your API Platform organization.
- Ensure your enterprise identity provider includes the group/role attributes in tokens it sends to Asgardeo via the respective protocol.
- Be sure you have administrator privileges in API Platform.
Step 1: Configure Asgardeo
- Sign in to Asgardeo.
- Configure your IdP as an external IdP in Asgardeo. Depending on your IdP, you can select OpenID Connect or SAML as the protocol between Asgardeo and your IdP.
Note
If you are using OpenID Connect, configure the requested scopes accordingly for Asgardeo to get the relevant group/role details from the external IdP.
-
To configure the application, follow the steps given below:
-
In the Asgardeo Console left navigation menu, click Applications
- Click on the WSO2_LOGIN_FOR_BIJIRA or WSO2_LOGIN_FOR_BIJIRADEVPORTAL application that you want to configure
- Click the Sign-in Method tab.
- Configure the IdP for login depending on the protocol you selected:
- For OpenID Connect, follow the instructions in Enable the OIDC IdP for login.
- For SAML, follow the instructions in Enable the SAML IdP for login.
- Click the User Attributes tab.
- Select the Groups attribute and click the arrow to expand the section. Then, select the Requested checkbox.
-
Click Update.
-
To add the user attributes as OpenID Connect scopes, follow the steps given below:
- In the Asgardeo Console left navigation menu, click Scopes.
- In the OpenID Connect Scopes pane, click OpenID to edit it.
- Click New Attribute and select the Groups attribute.
- Click Save and then click Save Changes.
Step 2: Map API Platform groups to enterprise IdP groups via the API Platform Console
Note
Before you map API Platform groups to enterprise IdP groups, ensure you meet the following criteria:
- You have permission to perform actions of the organization administrator role.
- Sign in to the API Platform Console.
- In the API Platform Console, go to the top navigation menu and click Organization. This takes you to the organization's home page.
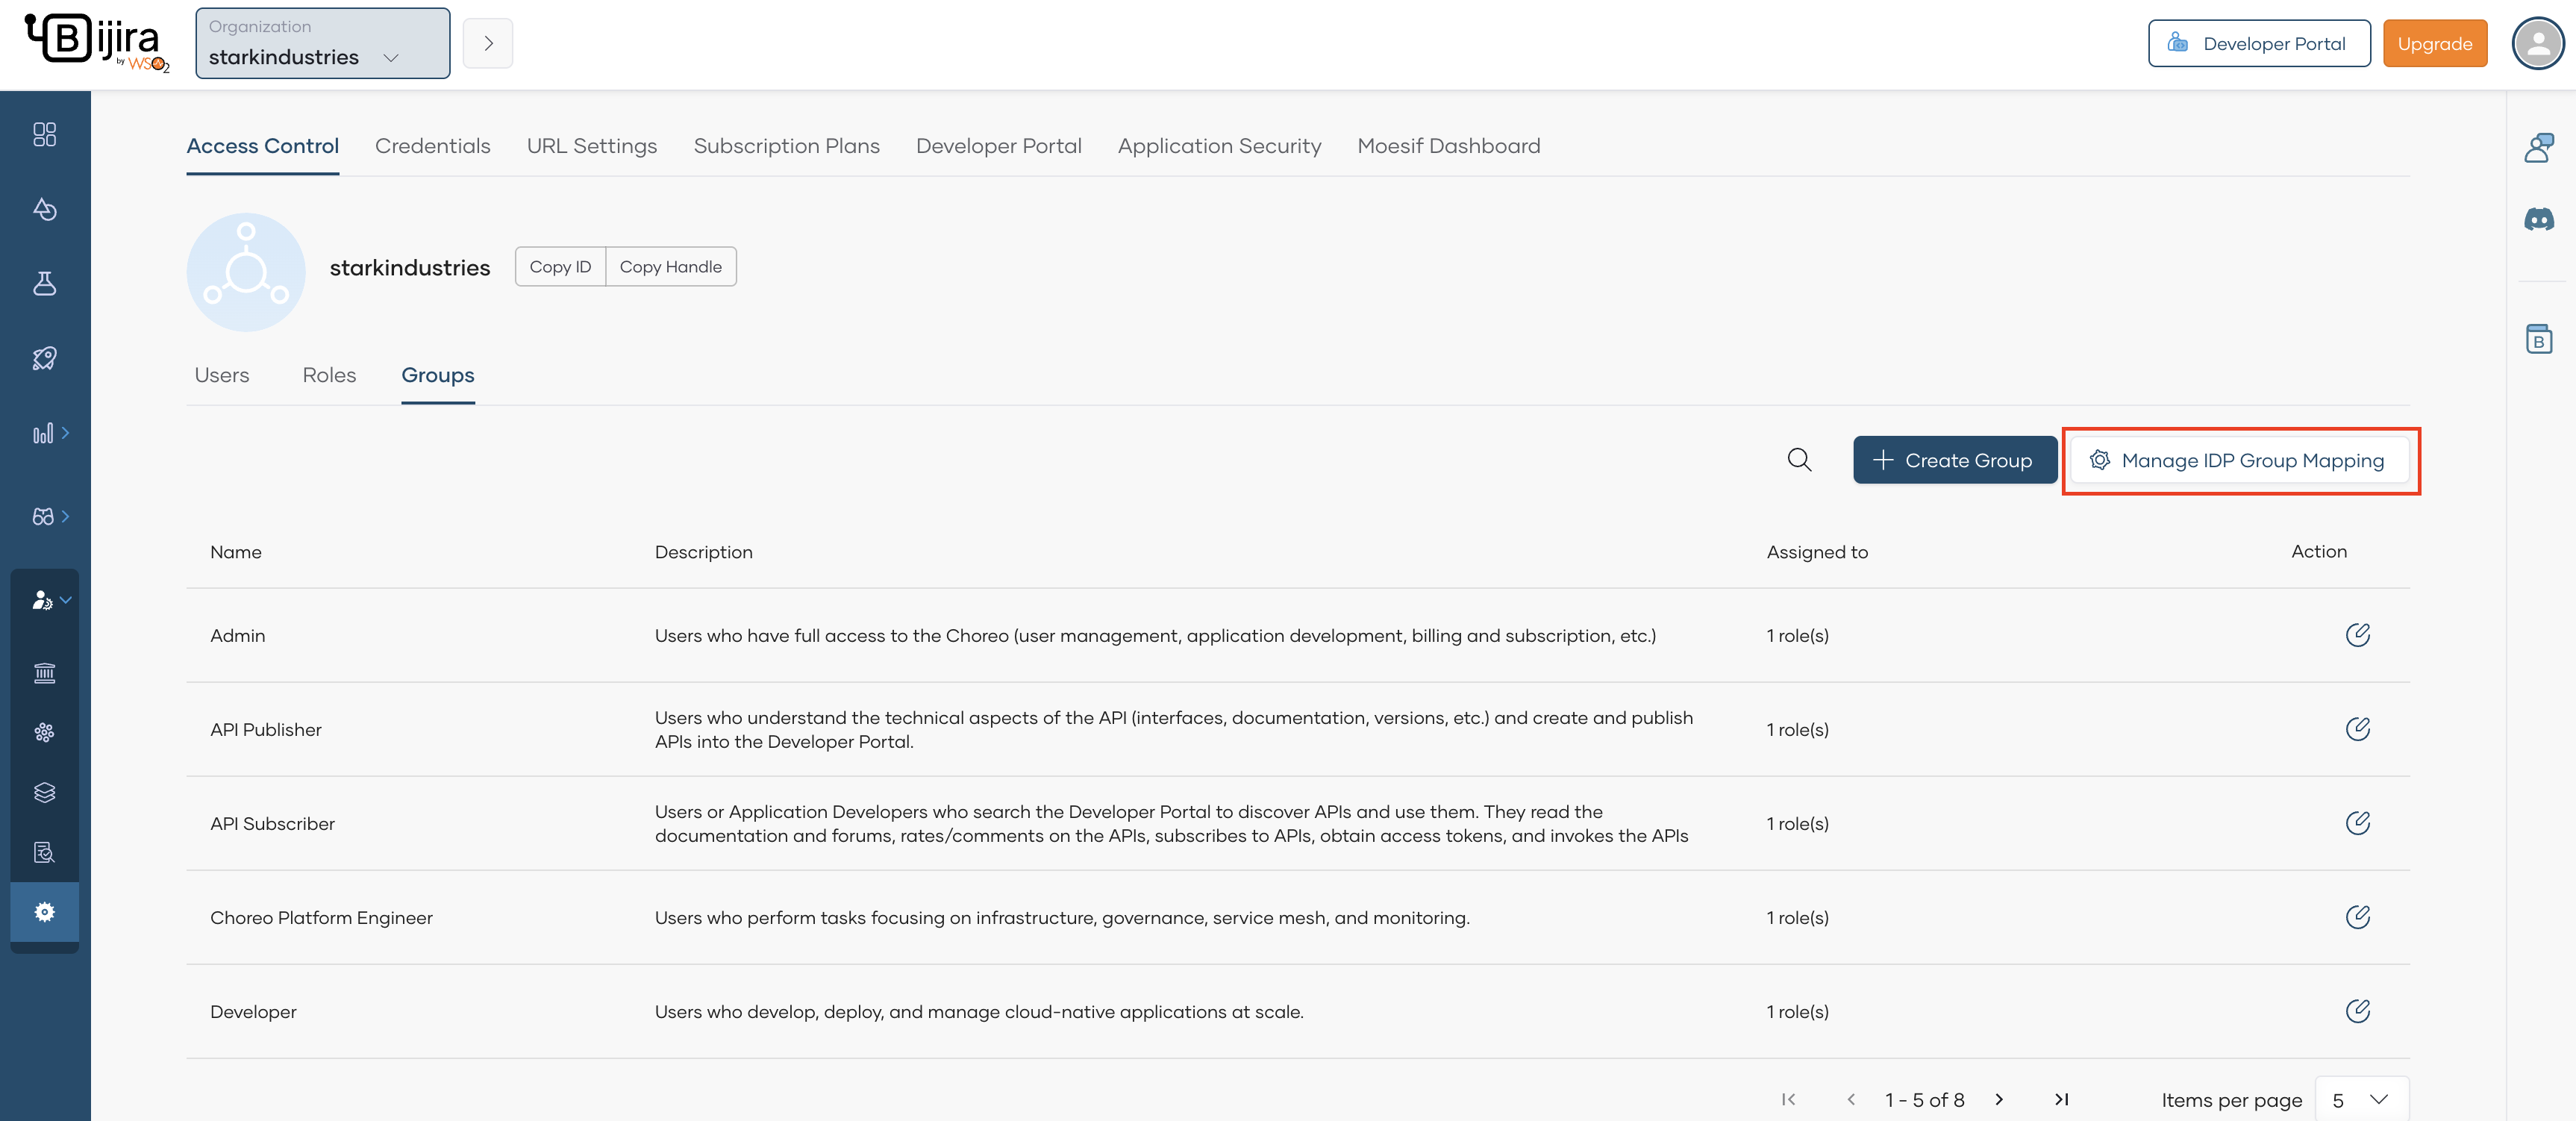
- In the left navigation menu, click Settings. This opens the organization-level settings page.
-
In the Access Control tab, click Groups.
-
Click Manage IdP Group Mapping.
-
Click the edit icon corresponding to the API Platform group you want to map to the enterprise IdP group.
-
In the IdP Group Name field, specify the exact name you configured in the enterprise IdP and enter to add it.
Tip
If there is a change to the IdP group mapping, it takes effect from the next login session onwards.
-
Click Save.
By following these steps, you have successfully configured role-based access control for enterprise login in API Platform, allowing users from the external IdP to have the appropriate permission.